

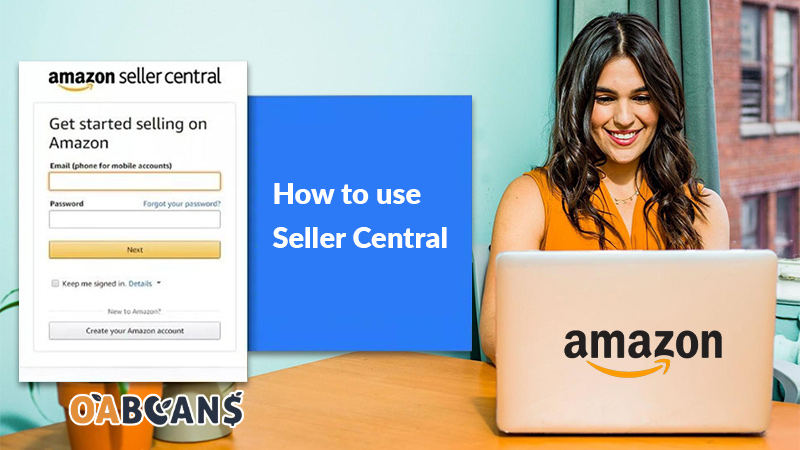
What is Amazon Seller Central?
Amazon Seller Central is the web interface that allows manufacturers, suppliers, and third-party sellers to sell their products on the Amazon marketplace.
Unlike Vendor Central, the seller does not sell to Amazon but directly to the end customer. They are therefore considered a merchant or a third-party seller, not an Amazon supplier.
Registration for the Seller Central program is free (after a few validation steps).
How to Use Amazon Seller Central?
Amazon seller central is open to anyone or any business who wants to sell their products on Amazon. The first thing you’ll need to do is decide which account plan you want to join: Individual or Professional.
The individual seller account is designed for those who want to start selling on Amazon and will offer a maximum of 40 products per month. By choosing the individual plan, you will only have to pay Amazon when you make a sale, which would be $0.99 per product.
As for the Professional seller plan, this type of account can be present in all categories of Amazon, create new products in the company’s listings or allow the purchase of their products by clicking on them. This type of account costs $39.99 per month, regardless of the number of products you sell.
In the following sections of this Amazon seller central guide, we will provide answers to the most common questions asked by new sellers on the platform.
How to Create Account in Amazon Seller Central?
Once you figure out the plan (Individual or Professional) you want to use for selling on Amazon, follow the steps below to create your seller central account:
- Go to https://services.amazon.com
- Click on “Learn More,” go to the “Pricing” tab and click on “Compare selling plans.” On the next page, you can see the differences between the Individual and Professional selling plans.
- After comparing the two plans and deciding which works best for you, choose your plan and enter your email address and password on the next page. Click the “Next” button to continue.
- Now you need to verify the email you entered. Look out for an email from Amazon and when you receive it, click on the link they provide to verify your email. By clicking on the link, you will be taken to a new screen where you’ll have to choose your “Business location” and “Business type.” If you don’t have a business, choose “None, I am an individual.” This will open up a new field where you must enter your full name.
- Click “Agree and continue.”
- On the next page, enter your personal information (date of birth, address, phone number, etc.) and click “Next.”
- Then, you have to enter your billing information, including a valid bank account number. After entering the required info, click on “I Understand” and verify your banking information. Then, enter your credit card details and click “Next.”
- After validating your banking information, you’ll have to answer some questions about your store, such as the name of your store, whether you have UPCs for your products, etc. Click “Next” when you’re done.
- On the next page, you’ll have to verify your identity by uploading images of your ID (license or passport) and a bank statement. Click “Submit” after uploading your documents.
- Finally, Amazon will ask you to confirm the business address you provided previously. After clicking on “Confirm,” a new screen will appear stating that you will receive a postcard with a verification code at that address.
- When you receive the postcard, enter the verification code into the “Enter code below” field and click “Next” to finish registration.
Congratulations! You are now officially a seller on Amazon.
How to Add a Product on Amazon Seller Central?
In this section of the Amazon seller central guide, you’ll see how you can add a product to the platform. You can either add the product to an existing listing or make a new one (if the product is not already listed on Amazon).
Add a product to an existing listing:
- Try to find the ASIN of your product in the existing listing’s URL or under “Product details.”
- On your seller central account, go to “Add a product” under the Inventory tab and search for the product’s ASIN.
- Choose the condition of the product and click “Sell this product.”
- Enter your selling price, item condition, and other requested information. Click on “Save and finish.”
Create a new listing for your product:
- On your seller central account, under the Inventory tab, go to “Add a product” and click on “I’m adding a product not sold on Amazon.”
- Select your product category, and enter the requested information (including the title, price, brand name, images, etc.)
- Finally, click “Save and finish” to list your product on Amazon.
How to Add Videos to the Products on the Amazon Seller Central?
- Log in to your seller central account, and under the Inventory tab, click on “Upload and Manage Videos.”
- Click on the “Upload Video” button on the right side of the page, and select the video you want to upload.
- Create a title using the right keywords, and choose a thumbnail to represent your video (or use the one Amazon automatically chose).
- Select the ASINs/products related to your video – you can find the ASIN in the product listing’s URL.
- When you’re done, click “Submit” to send the content for approval. Once approved, your video will be available on the product detail page.
How to Access Advertising in Seller Central?
In this section of our Amazon seller central guide, we’ll see how you can access advertising and start a new campaign on your account:
- Start by clicking “Campaign Manager” under the Advertising tab on your seller central account.
- Select Create Campaign, and choose your campaign type (Sponsored Products, Sponsored Brands, or Sponsored Display).
- Name your campaign and choose a daily budget for it.
How to Manage Orders in Amazon Seller Central (FBM)?
By choosing FBM (Fulfillment by Merchant) as your fulfillment method, you choose to handle the fulfillment of orders yourself. This means that after receiving an order, you must fulfill it by purchasing a shipping label and marking the order as shipped.
To do this, find the Orders tab on your seller central account and click on “Manage Orders.” Any unfulfilled FBM and Amazon FBA business orders will be visible here.
How to Cancel an Order on Amazon Seller Central?
As a seller, you can cancel orders anytime before shipping the product. After the product is shipped, the order cannot be canceled. To do this, follow the steps below:
- Access the Manage Orders section on your seller central account and go to “View Your Orders.”
- Find the order you want to cancel, and look for the “Cancel Order” button. It is located either next to or below the order.
- Click on the button, and on the next page, choose the Reason for Cancellation from the provided menu, and press “Submit.”
How to Manage FBA Shipments in Seller Central?
The next thing we’ll discuss in our Amazon seller central guide is managing FBA (Fulfilled by Amazon) orders. To review the status of these orders, go to the Manage Orders page and click the “view FBA orders” link.
You will see a list of all Unshipped, Pending, Shipped, and Canceled orders. You can also find the payments for completed orders in your Payments report.
How to Contact Amazon Seller Central?
You can contact Amazon seller central support via email by following the steps below:
- Log in to your seller central account and click on “Help” in the top-right corner of the screen.
- On the pop-up box that appears, under the “Need more help?” section, click “Get Support.”
- For any general inquiry unrelated to Sponsored Ads or your Amazon store, click “selling on Amazon.”
- Find a matching problem in the list of options and choose it.
- You’ll be asked if you prefer to get a phone call back or an email. Choose email.
- After completing the query, you’ll receive a ticket or Case ID. They will get back to you via email or call you even though you chose email. In this case, try to be prepared and answer the rep calmly while addressing your problem.
How to Give Child Access on Amazon Seller Central?
You can give third parties access to your seller central dashboard as an Amazon account owner. This is helpful if you have hired an agency, a virtual assistant, or added new employees to your business and want them to access your store. You can also use this feature to grant a business partner or a co-owner access to your Amazon store. To give child access to your Amazon seller central, follow the steps below:
- Head to the Settings in your seller central account, and select “User Permissions” from the drop-down menu.
- In the “Add a New User” section, type the name and email address of the person you want to give access to and click the “Send Invitation” button.
- The person will receive an email from Amazon asking them to create a child account. They can follow the link included in the email to open the sign-up page on Amazon.
- In the “Create account” section, they must use the email address which received the invitation.
- After selecting the right marketplace, their registration will be complete.
You can edit user permissions by going back to Settings > User permissions. In the Current Users section, you’ll find a new entry. Select the “Manage Permissions” option next to the newly created child account. On the next page, you can edit the permissions and give different viewing rights to the user.
How to Access Business Reports on Seller Central?
Accessing business reports is another matter that we should discuss in the Amazon seller central guide. These reports give you the necessary data on the critical aspects of your business that you must focus on.
You can access Business Reports under your seller central account’s “Reports” tab. Different types of reports are available: Sales Dashboard, Business Reports by Date, and Business Reports by ASIN.
How to Download Invoice from Amazon Seller Central?
To download an invoice from Amazon seller central, log in to your account and follow the steps below:
- Under the Orders tab, click “Order Reports.”
- On the next page, go to “Bulk Invoice Download.”
- You can choose the exact date range of your invoice and enter the dates in the “From” and “To” fields.
- Find the invoice you want to download and click the “Download” button.
How to Check Account Health on Amazon Seller Central?
As an Amazon seller, there are many rules and guidelines you’ll need to follow. One is keeping your seller metrics above a certain level, called Amazon account health. You need to check this regularly and work on your metrics to avoid suspension. To access your Account Health page, open the “Performance” menu on your seller central and click “Account Health.”
On this page, you can access an overview of how well you’re doing as a seller on Amazon.
How to Check the Latest News of Amazon?
You can find the latest news related to Amazon by going to https://www.aboutamazon.com/news. You can also subscribe (by clicking on “Subscribe” on the top-right of the page) to receive the latest news and updates via email.
If you’re looking for the best recourses to learn online/retail arbitrage on Amazon, you can head over to the OABeans blog.
How to Access Amazon Seller Courses & Trainings?
Amazon has a page dedicated to providing educational resources that help brands, businesses, and entrepreneurs succeed as a seller on the platform. They call this page “Seller University” and offer many useful articles for sellers. To access this page, click on this link: https://sell.amazon.com/learn
Additionally, you can find great online courses on websites such as Udemy.
How to Create Discounts in Seller Central?
Offering discounts and promotions are great ways to boost your sales, especially if you have recently launched a new product. Offering discounts on your products can increase sales, make it easier to get feedback and reviews and increase the organic ranking of your keywords. Follow the steps provided in this Amazon seller central guide to create promotions on Amazon:
- After logging in to your seller central account, find “Promotions” under the Advertising tab and click on it.
- On the new “Create Promotions” tab that opens up, choose Percentage Off or Money Off to offer a certain amount of discount for your product.
- Click on the “Create” button. On the next page, there will be three sections: Conditions, Scheduling, and Additional Options.
- Conditions: The promotion will only be displayed to the buyer if the options set in the conditions tab are valid for the user.
- Scheduling: Here, you can specify the period during which the promotion remains active.
- Additional Options: You can set up the most important factors of your product promotion here.
- After entering the requested information, click the “Save and finish” button to finish setting up your promotions.
How to Change Account Information in Seller Central?
To change your account information on seller central, you can go to “Settings,” which is available in the top-right corner of the page. Then, select Account Info from the drop-down menu, which gives you access to your seller profile, payment information, business information, shipping and returns information, and tax information.
You can click “Edit” for any of the information you want to change.
How to Manage Brand Registry in Amazon Seller Central?
Sellers who want to enroll their brand with Amazon can create an Amazon Brand Registry account with the same credentials they used for their Amazon seller account. After enrolling in Amazon’s Brand Registry program, they will have access to more tools and features compared to other sellers who haven’t enrolled in the program.

You can access the Brand Dashboard by going to the “Brands” tab and clicking “Brand Dashboard.” You can manage your enrolled brands and negative customer reviews, create A/B tests, and more.
Final Thoughts
It’s all in the name: seller central is the headquarters of any Amazon seller’s store or brand. You can access any settings you want to change on this page, monitor account health, and manage your Amazon advertising campaigns. This Amazon seller central guide answered the most common questions about this platform. You can use this information to monitor your account and improve your selling experience on Amazon.
FAQ


Amazon FBA can help you maintain a competitive edge in your market by providing fast and dependable order fulfillment.
I appreciate the clarity and simplicity of your website. The straightforward and practical advice you offer has helped me grow my Amazon reselling business with greater confidence and success.
I love that I can track my orders and receive real-time updates on delivery status on Amazon Marketplace.
I’ve saved so much time by following the advice offered here for Amazon online arbitrage.
With Amazon FBA, you have access to Amazon’s expertise in global logistics and shipping.
Your website’s emphasis on using data and analytics to drive business decisions has been crucial to my own success as an Amazon reseller. Your guides on using Amazon’s data analytics tools have provided valuable insights that make a real difference in my bottom line.
The competitive marketplace on Amazon keeps resellers on their toes, constantly seeking out new products and strategies to stay ahead.
The scalability of Amazon FBA is impressive. Whether you’re a small seller or a large enterprise, the infrastructure can handle your growing business needs.
Reselling on Amazon offers a low-risk and accessible business opportunity, where you can start with minimal investment and gradually grow your business.
With Amazon’s data-driven insights, you can identify emerging market trends and capitalize on new opportunities for your reselling business.
The supportive community of online arbitrage sellers offers valuable resources, tips, and strategies to help you navigate the competitive landscape and achieve success.